Admin Guide
After the Ceph Object Storage service is up and running, it can be administered with user management, access controls, quotas, and usage tracking.
User Management
Ceph Object Storage user management refers only to users of the Ceph Object Storage service and not to the Ceph Object Gateway as a user of the Ceph Storage Cluster. Create a user, access key, and secret key to enable end users to interact with Ceph Object Gateway services.
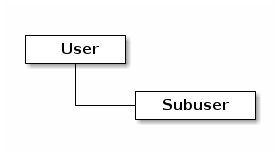
There are two types of user:
User: The term “user” refers to user of the S3 interface.
Subuser: The term “subuser” refers to a user of the Swift interface. A subuser is associated with a user.
Users and subusers can be created, modified, viewed, suspended and removed. you may add a Display names and an email addresses can be added to user profiles. Keys and secrets can either be specified or generated automatically. When generating or specifying keys, remember that user IDs correspond to S3 key types and subuser IDs correspond to Swift key types.
Swift keys have access levels of read, write, readwrite and
full.
Create a User
To create a user (S3 interface), run a command of the following form:
radosgw-admin user create --uid={username} --display-name="{display-name}" [--email={email}]
For example:
radosgw-admin user create --uid=johndoe --display-name="John Doe" --email=john@example.com
{ "user_id": "johndoe",
  "display_name": "John Doe",
  "email": "john@example.com",
  "suspended": 0,
  "max_buckets": 1000,
  "subusers": [],
  "keys": [
        { "user": "johndoe",
          "access_key": "11BS02LGFB6AL6H1ADMW",
          "secret_key": "vzCEkuryfn060dfee4fgQPqFrncKEIkh3ZcdOANY"}],
  "swift_keys": [],
  "caps": [],
  "op_mask": "read, write, delete",
  "default_placement": "",
  "placement_tags": [],
  "bucket_quota": { "enabled": false,
      "max_size_kb": -1,
      "max_objects": -1},
  "user_quota": { "enabled": false,
      "max_size_kb": -1,
      "max_objects": -1},
  "temp_url_keys": []}
The creation of a user entails the creation of an access_key and a
secret_key entry, which can be used with any S3 API-compatible client.
Important
Check the key output. Sometimes radosgw-admin generates a
JSON escape (\) character, and some clients do not know how to handle
JSON escape characters. Remedies include removing the JSON escape character
(\), encapsulating the string in quotes, regenerating the key and
ensuring that it does not have a JSON escape character, or specifying the
key and secret manually.
Create a Subuser
To create a subuser (a user of the Swift interface) for the user, specify the
user ID (--uid={username}), a subuser ID, and the subuser’s access level:
radosgw-admin subuser create --uid={uid} --subuser={uid} --access=[ read | write | readwrite | full ]
For example:
radosgw-admin subuser create --uid=johndoe --subuser=johndoe:swift --access=full
Note
full is not the same as readwrite. The full access level
includes read and write, but it also includes the access control
policy.
{ "user_id": "johndoe",
  "display_name": "John Doe",
  "email": "john@example.com",
  "suspended": 0,
  "max_buckets": 1000,
  "subusers": [
        { "id": "johndoe:swift",
          "permissions": "full-control"}],
  "keys": [
        { "user": "johndoe",
          "access_key": "11BS02LGFB6AL6H1ADMW",
          "secret_key": "vzCEkuryfn060dfee4fgQPqFrncKEIkh3ZcdOANY"}],
  "swift_keys": [],
  "caps": [],
  "op_mask": "read, write, delete",
  "default_placement": "",
  "placement_tags": [],
  "bucket_quota": { "enabled": false,
      "max_size_kb": -1,
      "max_objects": -1},
  "user_quota": { "enabled": false,
      "max_size_kb": -1,
      "max_objects": -1},
  "temp_url_keys": []}
Get User Info
To get information about a user, specify user info and the user ID
(--uid={username}). Use a command of the following form:
radosgw-admin user info --uid=johndoe
Modify User Info
To modify information about a user, specify the user ID (--uid={username})
and the attributes that you want to modify. Typical modifications are made to
keys and secrets, email addresses, display names, and access levels. Use a
command of the following form:
radosgw-admin user modify --uid=johndoe --display-name="John E. Doe"
To modify subuser values, specify subuser modify, user ID and the subuser
ID. Use a command of the following form:
radosgw-admin subuser modify --uid=johndoe --subuser=johndoe:swift --access=full
User Suspend
When a user is created, the user is enabled by default. However, it is possible
to suspend user privileges and to re-enable them at a later time. To suspend a
user, specify user suspend and the user ID in a command of the following
form:
radosgw-admin user suspend --uid=johndoe
User Enable
To re-enable a suspended user, provide user enable and specify the user ID
in a command of the following form:
radosgw-admin user enable --uid=johndoe
Note
Disabling the user also disables any subusers.
Remove a User
When you remove a user, you also remove any subusers associated with the user.
It is possible to remove a subuser without removing its associated user. This is covered in the section called Remove a Subuser.
To remove a user and any subusers associated with it, use the user rm
command and provide the user ID of the user to be removed. Use a command of the
following form:
radosgw-admin user rm --uid=johndoe
Options include:
Purge Data: The
--purge-dataoption purges all data associated with the UID.Purge Keys: The
--purge-keysoption purges all keys associated with the UID.
Remove a Subuser
Removing a subuser removes access to the Swift interface or to S3. The user associated with the removed subuser remains in the system after the subuser’s removal.
To remove the subuser, use the command subuser rm and provide the subuser
ID of the subuser to be removed. Use a command of the following form:
radosgw-admin subuser rm --subuser=johndoe:swift
Options include:
Purge Keys: The
--purge-keysoption purges all keys associated with the UID.
Add or Remove a Key
Both users and subusers require a key to access the S3 or Swift interface. To use S3, the user needs a key pair which is composed of an access key and a secret key. To use Swift, the user needs a secret key (password), which is used together with its associated user ID. You can create a key and either specify or generate the access key or secret key. You can also remove a key. Options include:
--key-type=<type>specifies the key type. The options are:s3,swift--access-key=<key>manually specifies an S3 access key.--secret-key=<key>manually specifies a S3 secret key or a Swift secret key.--gen-access-keyautomatically generates a random S3 access key.--gen-secretautomatically generates a random S3 secret key or a random Swift secret key.
Adding S3 keys
To add a specific S3 key pair for a user, run a command of the following form:
radosgw-admin key create --uid=foo --key-type=s3 --access-key fooAccessKey --secret-key fooSecretKey
{ "user_id": "foo",
  "rados_uid": 0,
  "display_name": "foo",
  "email": "foo@example.com",
  "suspended": 0,
  "keys": [
    { "user": "foo",
      "access_key": "fooAccessKey",
      "secret_key": "fooSecretKey"}],
}
Note
You can create multiple S3 key pairs for a user.
Adding Swift secret keys
To attach a specific Swift secret key for a subuser, run a command of the following form:
radosgw-admin key create --subuser=foo:bar --key-type=swift --secret-key barSecret
{ "user_id": "foo",
  "rados_uid": 0,
  "display_name": "foo",
  "email": "foo@example.com",
  "suspended": 0,
  "subusers": [
     { "id": "foo:bar",
       "permissions": "full-control"}],
  "swift_keys": [
    { "user": "foo:bar",
      "secret_key": "asfghjghghmgm"}]}
Note
A subuser can have only one Swift secret key.
Associating subusers with S3 key pairs
Subusers can also be used with S3 APIs if the subuser is associated with a S3 key pair. To associate a subuser with an S3 key pair, run a command of the following form:
radosgw-admin key create --subuser=foo:bar --key-type=s3 --access-key barAccessKey --secret-key barSecretKey
{ "user_id": "foo",
  "rados_uid": 0,
  "display_name": "foo",
  "email": "foo@example.com",
  "suspended": 0,
  "subusers": [
     { "id": "foo:bar",
       "permissions": "full-control"}],
  "keys": [
    { "user": "foo:bar",
      "access_key": "barAccessKey",
      "secret_key": "barSecretKey"}],
}
Removing S3 key pairs
To remove a S3 key pair, specify the access key to be removed. Run a command of the following form:
radosgw-admin key rm --uid=foo --key-type=s3 --access-key=fooAccessKey
Removing Swift secret keys
To remove a Swift secret key, run a command of the following form:
radosgw-admin key rm --subuser=foo:bar --key-type=swift
Add or Remove Admin Capabilities
The Ceph Storage Cluster provides an administrative API that enables users to execute administrative functions via the REST API. By default, users do NOT have access to this API. To enable a user to exercise administrative functionality, provide the user with administrative capabilities.
To add administrative capabilities to a user, run a command of the following form:
radosgw-admin caps add --uid={uid} --caps={caps}
You can add read, write or all capabilities to users, buckets, metadata and usage (utilization). To do this, use a command-line option of the following form:
--caps="[users|buckets|metadata|usage|zone|amz-cache|info|bilog|mdlog|datalog|user-policy|oidc-provider|roles|ratelimit]=[\*|read|write|read, write]"
For example:
radosgw-admin caps add --uid=johndoe --caps="users=*;buckets=*"
To remove administrative capabilities from a user, run a command of the following form:
radosgw-admin caps rm --uid=johndoe --caps={caps}
Quota Management
The Ceph Object Gateway makes it possible for you to set quotas on users and buckets owned by users. Quotas include the maximum number of objects in a bucket and the maximum storage size a bucket can hold.
Bucket: The
--bucketoption allows you to specify a quota for buckets the user owns.Maximum Objects: The
--max-objectssetting allows you to specify the maximum number of objects. A negative value disables this setting.Maximum Size: The
--max-sizeoption allows you to specify a quota size in B/K/M/G/T, where B is the default. A negative value disables this setting.Quota Scope: The
--quota-scopeoption sets the scope for the quota. The options arebucketanduser. Bucket quotas apply to each bucket owned by the user. User Quotas are summed across all buckets owned by the user.
Set User Quota
Before you enable a quota, you must first set the quota parameters. To set quota parameters, run a command of the following form:
radosgw-admin quota set --quota-scope=user --uid=<uid> [--max-objects=<num objects>] [--max-size=<max size>]
For example:
radosgw-admin quota set --quota-scope=user --uid=johndoe --max-objects=1024 --max-size=1024B
Passing a negative value as an argument of --max-objects or --max-size
disables the given quota attribute.
Enabling and Disabling User Quota
After a user quota is set, it must be enabled in order to take effect. To enable a user quota, run a command of the following form:
radosgw-admin quota enable --quota-scope=user --uid=<uid>
To disable an enabled user quota, run a command of the following form:
radosgw-admin quota disable --quota-scope=user --uid=<uid>
Set Bucket Quota
Bucket quotas apply to the buckets owned by the specified uid. They are
independent of the user. To set a bucket quota, run a command of the following
form:
radosgw-admin quota set --uid=<uid> --quota-scope=bucket [--max-objects=<num objects>] [--max-size=<max size]
A negative value for --max-objects or --max-size means that the
specific quota attribute is disabled.
Enable and Disabling Bucket Quota
After a bucket quota has been set, it must be enabled in order to take effect. To enable a bucket quota, run a command of the following form:
radosgw-admin quota enable --quota-scope=bucket --uid=<uid>
To disable an enabled bucket quota, run a command of the following form:
radosgw-admin quota disable --quota-scope=bucket --uid=<uid>
Get Quota Settings
You can access each user’s quota settings via the user information API. To read user quota setting information with the CLI interface, run a command of the following form:
radosgw-admin user info --uid=<uid>
Update Quota Stats
Quota stats are updated asynchronously. You can update quota statistics for all users and all buckets manually to force an update of the latest quota stats. To update quota statistics for all users and all buckets in order to retrieve the latest quota statistics, run a command of the following form:
radosgw-admin user stats --uid=<uid> --sync-stats
Get User Usage Stats
To see how much of a quota a user has consumed, run a command of the following form:
radosgw-admin user stats --uid=<uid>
Note
Run radosgw-admin user stats with the --sync-stats option to
receive the latest data.
Default Quotas
You can set default quotas in the Ceph Object Gateway config. These defaults
will be used only when creating new users and will have no effect on existing
users. If a default quota is set in the Ceph Object Gateway Config, then that
quota is set for all subsequently-created users, and that quota is enabled. See
rgw_bucket_default_quota_max_objects,
rgw_bucket_default_quota_max_size, rgw_user_default_quota_max_objects,
and rgw_user_default_quota_max_size in Ceph Object Gateway Config
Reference
Quota Cache
Quota statistics are cached by each RGW instance. If multiple RGW instances are deployed, then this cache may prevent quotas from being perfectly enforced, because each instance may have a different set of quota settings.
Here are the options that control this behavior:
rgw_bucket_quota_ttl
rgw_user_quota_bucket_sync_interval
rgw_user_quota_sync_interval
Increasing these values will make quota operations more efficient at the cost of increasing the likelihood that the multiple RGW instances may not consistently have the latest quota settings. Decreasing these values brings the multiple RGW instances closer to perfect quota synchronization.
If all three values are set to 0 , then quota caching is effectively
disabled, and multiple instances will have perfect quota enforcement. See
Ceph Object Gateway Config Reference.
Reading / Writing Global Quotas
You can read and write global quota settings in the period configuration. To view the global quota settings, run the following command:
radosgw-admin global quota get
Global quota settings can be manipulated with the global quota
counterparts of the quota set, quota enable, and quota disable
commands, as in the following examples:
radosgw-admin global quota set --quota-scope bucket --max-objects 1024
radosgw-admin global quota enable --quota-scope bucket
Note
In a multisite configuration where there is a realm and period
present, changes to the global quotas must be committed using period
update --commit. If no period is present, the RGW instances must
be restarted for the changes to take effect.
Rate Limit Management
Quotas can be set for The Ceph Object Gateway on users and buckets. The “rate limit” includes the maximum number of read operations (read ops) and write operations (write ops) per minute as well as the number of bytes per minute that can be written or read per user or per bucket.
Read Requests and Write Requests
Operations that use the GET method or the HEAD method in their REST
requests are “read requests”. All other requests are “write requests”.
How Metrics Work
Each object gateway tracks per-user metrics separately from bucket metrics.
These metrics are not shared with other gateways. The configured limits should
be divided by the number of active object gateways. For example, if “user A” is
to be be limited to 10 ops per minute and there are two object gateways in the
cluster, then the limit on “user A” should be 5 (10 ops per minute / 2
RGWs). If the requests are not balanced between RGWs, the rate limit might
be underutilized. For example: if the ops limit is 5 and there are two
RGWs, but the Load Balancer sends load to only one of those RGWs, the
effective limit is 5 ops, because this limit is enforced per RGW. If the rate
limit that has been set for the bucket has been reached but the rate limit that
has been set for the user has not been reached, then the request is cancelled.
The contrary holds as well: if the rate limit that has been set for the user
has been reached but the rate limit that has been set for the bucket has not
been reached, then the request is cancelled.
The accounting of bandwidth happens only after a request has been accepted.
This means that requests will proceed even if the bucket rate limit or user
rate limit is reached during the execution of the request. The RGW keeps track
of a “debt” consisting of bytes used in excess of the configured value; users
or buckets that incur this kind of debt are prevented from sending more
requests until the “debt” has been repaid. The maximum size of the “debt” is
twice the max-read/write-bytes per minute. If “user A” is subject to a 1-byte
read limit per minute and they attempt to GET an object that is 1 GB in size,
then the GET action will fail. After “user A” has completed this 1 GB
operation, RGW blocks the user’s requests for up to two minutes. After this
time has elapsed, “user A” will be able to send GET requests again.
Bucket: The
--bucketoption allows you to specify a rate limit for a bucket.User: The
--uidoption allows you to specify a rate limit for a user.Maximum Read Ops: The
--max-read-opssetting allows you to limit read bytes per minute per RGW instance. A0value disables throttling.Maximum Read Bytes: The
--max-read-bytessetting allows you to limit read bytes per minute per RGW instance. A0value disables throttling.Maximum Write Ops: The
--max-write-opssetting allows you to specify the maximum number of write ops per minute per RGW instance. A0value disables throttling.Maximum Write Bytes: The
--max-write-bytessetting allows you to specify the maximum number of write bytes per minute per RGW instance. A0value disables throttling.Rate Limit Scope: The
--ratelimit-scopeoption sets the scope for the rate limit. The options arebucket,userandanonymous. Bucket rate limit apply to buckets. The user rate limit applies to a user. Theanonymousoption applies to an unauthenticated user. Anonymous scope is available only for global rate limit.
Set User Rate Limit
Before you can enable a rate limit, you must first set the rate limit parameters. The following is the general form of commands that set rate limit parameters:
radosgw-admin ratelimit set --ratelimit-scope=user --uid=<uid>
<[--max-read-ops=<num ops>] [--max-read-bytes=<num bytes>]
[--max-write-ops=<num ops>] [--max-write-bytes=<num bytes>]>
An example of using radosgw-admin ratelimit set to set a rate limit might
look like this:
radosgw-admin ratelimit set --ratelimit-scope=user --uid=johndoe --max-read-ops=1024 --max-write-bytes=10240
A value of 0 assigned to --max-read-ops, --max-read-bytes,
--max-write-ops, or --max-write-bytes disables the specified rate
limit.
Get User Rate Limit
The radosgw-admin ratelimit get command returns the currently configured
rate limit parameters.
The following is the general form of the command that returns the current configured limit parameters:
radosgw-admin ratelimit get --ratelimit-scope=user --uid=<uid>
An example of using radosgw-admin ratelimit get to return the rate limit
parameters might look like this:
radosgw-admin ratelimit get --ratelimit-scope=user --uid=johndoe
A value of 0 assigned to --max-read-ops, --max-read-bytes,
--max-write-ops, or --max-write-bytes disables the specified rate
limit.
Enable and Disable User Rate Limit
After you have set a user rate limit, you must enable it in order for it to take effect. Run a command of the following form to enable a user rate limit:
radosgw-admin ratelimit enable --ratelimit-scope=user --uid=<uid>
To disable an enabled user rate limit, run a command of the following form:
radosgw-admin ratelimit disable --ratelimit-scope=user --uid=johndoe
Set Bucket Rate Limit
Before you enable a rate limit, you must first set the rate limit parameters. The following is the general form of commands that set rate limit parameters:
 radosgw-admin ratelimit set --ratelimit-scope=bucket --bucket=<bucket> <[--max-read-ops=<num ops>] [--max-read-bytes=<num bytes>]
[--max-write-ops=<num ops>] [--max-write-bytes=<num bytes>]>
An example of using radosgw-admin ratelimit set to set a rate limit for a
bucket might look like this:
radosgw-admin ratelimit set --ratelimit-scope=bucket --bucket=mybucket --max-read-ops=1024 --max-write-bytes=10240
A value of 0 assigned to --max-read-ops, --max-read-bytes,
--max-write-ops, or -max-write-bytes disables the specified bucket rate
limit.
Get Bucket Rate Limit
The radosgw-admin ratelimit get command returns the current configured rate
limit parameters.
The following is the general form of the command that returns the current configured limit parameters:
radosgw-admin ratelimit get --ratelimit-scope=bucket --bucket=<bucket>
An example of using radosgw-admin ratelimit get to return the rate limit
parameters for a bucket might look like this:
radosgw-admin ratelimit get --ratelimit-scope=bucket --bucket=mybucket
A value of 0 assigned to --max-read-ops, --max-read-bytes,
--max-write-ops, or --max-write-bytes disables the specified rate
limit.
Enable and Disable Bucket Rate Limit
After you set a bucket rate limit, you can enable it. The following is the
general form of the radosgw-admin ratelimit enable command that enables
bucket rate limits:
radosgw-admin ratelimit enable --ratelimit-scope=bucket --bucket=<bucket>
An enabled bucket rate limit can be disabled by running a command of the following form:
radosgw-admin ratelimit disable --ratelimit-scope=bucket --uid=mybucket
Reading and Writing Global Rate Limit Configuration
You can read and write global rate limit settings in the period’s configuration. To view the global rate limit settings, run the following command:
radosgw-admin global ratelimit get
The global rate limit settings can be manipulated with the global ratelimit
counterparts of the ratelimit set, ratelimit enable, and ratelimit
disable commands. Per-user and per-bucket ratelimit configurations override
the global configuration:
radosgw-admin global ratelimit set --ratelimit-scope bucket --max-read-ops=1024
radosgw-admin global ratelimit enable --ratelimit-scope bucket
The global rate limit can be used to configure the scope of the rate limit for all authenticated users:
radosgw-admin global ratelimit set --ratelimit-scope user --max-read-ops=1024
radosgw-admin global ratelimit enable --ratelimit-scope user
The global rate limit can be used to configure the scope of the rate limit for all unauthenticated users:
radosgw-admin global ratelimit set --ratelimit-scope=anonymous --max-read-ops=1024
radosgw-admin global ratelimit enable --ratelimit-scope=anonymous
Note
In a multisite configuration where a realm and a period are present,
any changes to the global rate limit must be committed using period update
--commit. If no period is present, the rados gateway(s) must be restarted
for the changes to take effect.
Usage
The Ceph Object Gateway logs the usage of each user. You can track the usage of each user within a specified date range.
Add
rgw_enable_usage_log = truein the[client.rgw]section ofceph.confand restart theradosgwservice.Note
Until Ceph has a linkable macro that handles all the many ways that options can be set, we advise that you set
rgw_enable_usage_log = truein central config or inceph.confand restart all RGWs.
Options include:
Start Date: The
--start-dateoption allows you to filter usage stats from a specified start date and an optional start time (format:yyyy-mm-dd [HH:MM:SS]).End Date: The
--end-dateoption allows you to filter usage up to a particular end date and an optional end time (format:yyyy-mm-dd [HH:MM:SS]).Log Entries: The
--show-log-entriesoption allows you to specify whether to include log entries with the usage stats (options:true|false).
Note
You can specify time to a precision of minutes and seconds, but the specified time is stored only with a one-hour resolution.
Show Usage
To show usage statistics, use the radosgw-admin usage show command. To show
usage for a particular user, you must specify a user ID. You can also specify a
start date, end date, and whether to show log entries. The following is an example
of such a command:
radosgw-admin usage show --uid=johndoe --start-date=2012-03-01 --end-date=2012-04-01
You can show a summary of usage information for all users by omitting the user ID, as in the following example command:
radosgw-admin usage show --show-log-entries=false
Trim Usage
Usage logs can consume significant storage space, especially over time and with heavy use. You can trim the usage logs for all users and for specific users. You can also specify date ranges for trim operations, as in the following example commands:
radosgw-admin usage trim --start-date=2010-01-01 --end-date=2010-12-31
radosgw-admin usage trim --uid=johndoe
radosgw-admin usage trim --uid=johndoe --end-date=2013-12-31