Integrating Keycloak with RadosGW
If Keycloak is set up as an OpenID Connect Identity Provider, it can be used by mobile apps and web apps to authenticate their users. By using the web token returned by the authentication process, a mobile app or web app can call AssumeRoleWithWebIdentity, receive a set of temporary S3 credentials, and use those credentials to make S3 calls.
Setting up Keycloak
Documentation for installing and operating Keycloak can be found here: https://www.keycloak.org/guides.
Configuring Keycloak to talk to RGW
To configure Keycloak to talk to RGW, add the following configurables:
[client.radosgw.gateway]
rgw sts key = {sts key for encrypting/ decrypting the session token}
rgw s3 auth use sts = true
Fetching a web token with Keycloak
Several examples of apps authenticating with Keycloak can be found here: https://github.com/keycloak/keycloak-quickstarts/blob/latest/docs/getting-started.md.
Here you might consider the example of the app-profile-jee-jsp app (in the link above). To fetch the access token (web token) for such an application using the grant type ‘client_credentials’, one can use client id and client secret as follows:
KC_REALM=demo
KC_CLIENT=<client id>
KC_CLIENT_SECRET=<client secret>
KC_SERVER=<host>:8080
KC_CONTEXT=auth

# Request Tokens for credentials
KC_RESPONSE=$( \
curl -k -v -X POST \
-H "Content-Type: application/x-www-form-urlencoded" \
-d "scope=openid" \
-d "grant_type=client_credentials" \
-d "client_id=$KC_CLIENT" \
-d "client_secret=$KC_CLIENT_SECRET" \
"http://$KC_SERVER/$KC_CONTEXT/realms/$KC_REALM/protocol/openid-connect/token" \
| jq .
)

KC_ACCESS_TOKEN=$(echo $KC_RESPONSE| jq -r .access_token)
It is also possible to fetch an access token for a particular user with the grant type ‘password’. To fetch such an access token, use client id, client secret, username, and password as follows:
 KC_REALM=demo
 KC_USERNAME=<username>
 KC_PASSWORD=<userpassword>
 KC_CLIENT=<client id>
 KC_CLIENT_SECRET=<client secret>
 KC_SERVER=<host>:8080
 KC_CONTEXT=auth

# Request Tokens for credentials
 KC_RESPONSE=$( \
 curl -k -v -X POST \
 -H "Content-Type: application/x-www-form-urlencoded" \
 -d "scope=openid" \
 -d "grant_type=password" \
 -d "client_id=$KC_CLIENT" \
 -d "client_secret=$KC_CLIENT_SECRET" \
 -d "username=$KC_USERNAME" \
 -d "password=$KC_PASSWORD" \
 "http://$KC_SERVER/$KC_CONTEXT/realms/$KC_REALM/protocol/openid-connect/token" \
 | jq .
 )

 KC_ACCESS_TOKEN=$(echo $KC_RESPONSE| jq -r .access_token)
KC_ACCESS_TOKEN can be used to invoke AssumeRoleWithWebIdentity: see
STS in Ceph.
Adding tags to a user in Keycloak
To create a user in Keycloak and add tags to it as its attributes, follow these steps:
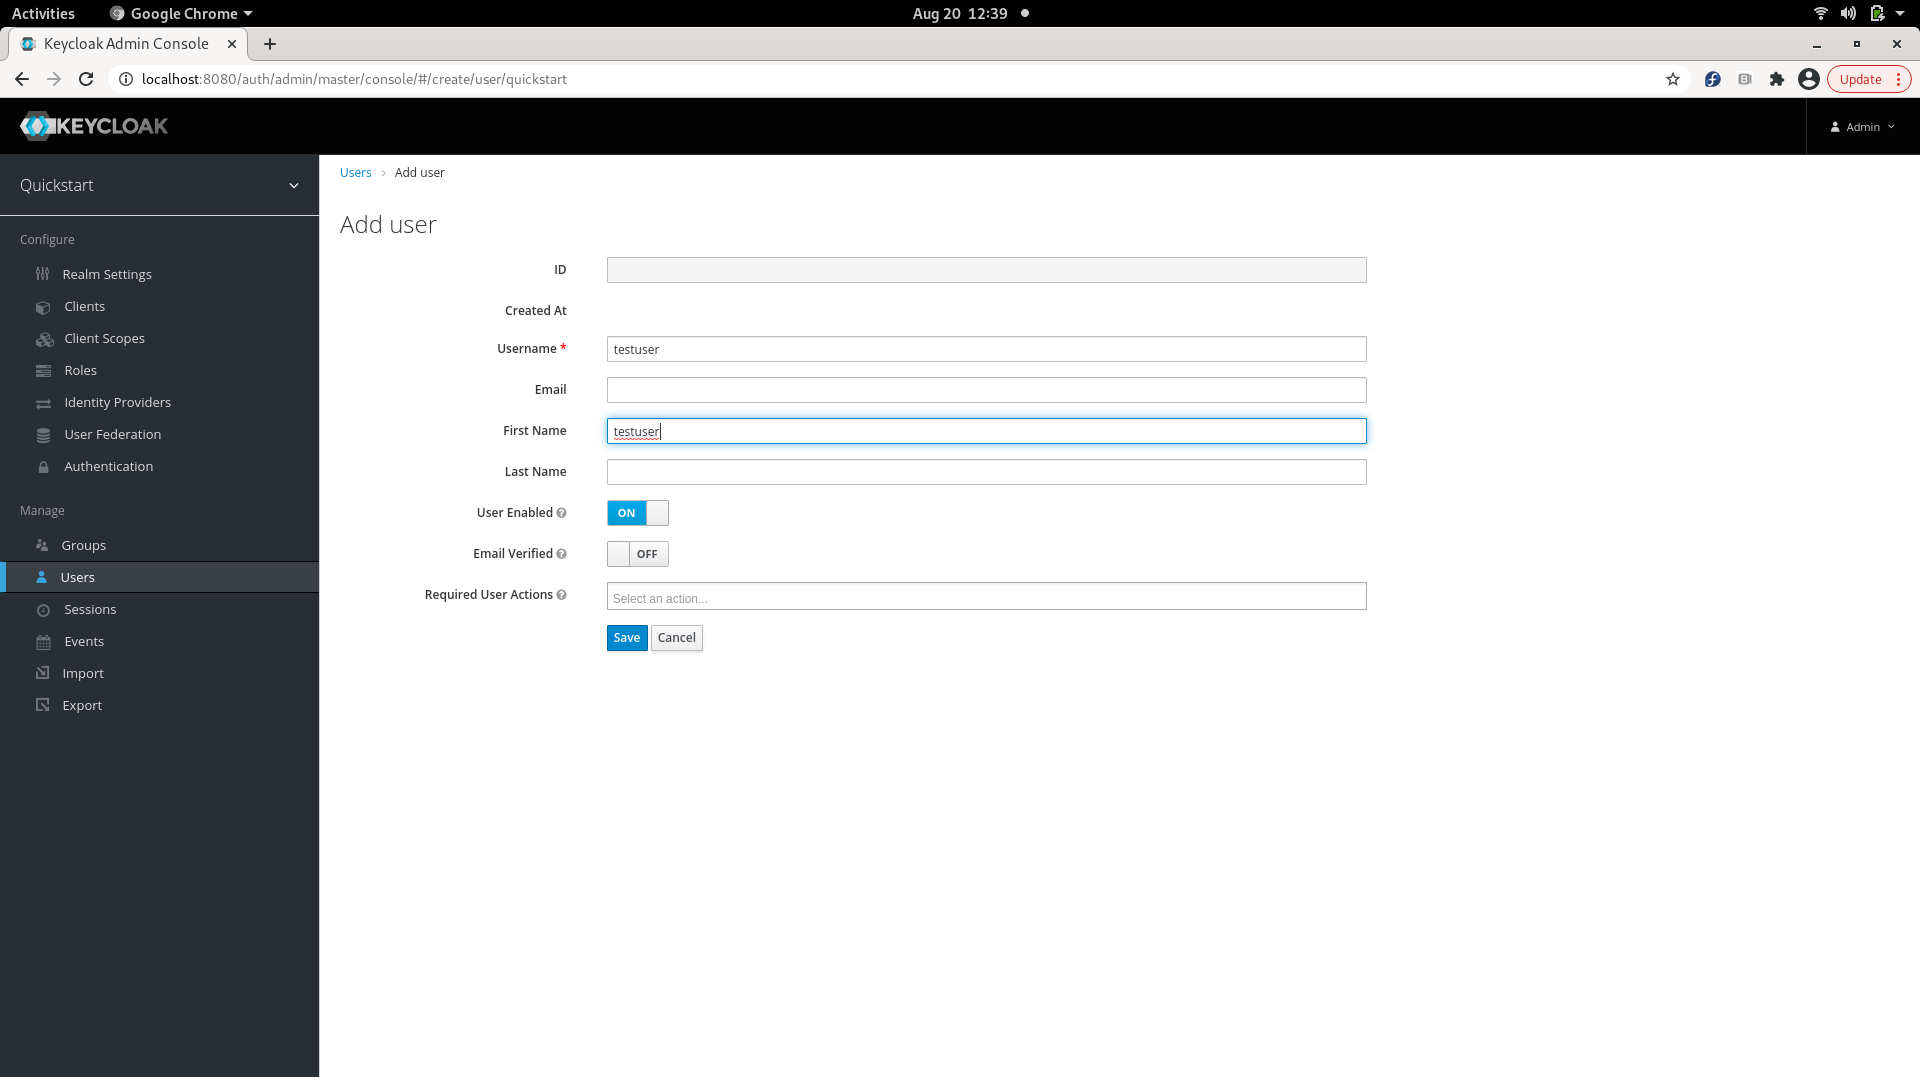
Add a user:

Add user details:
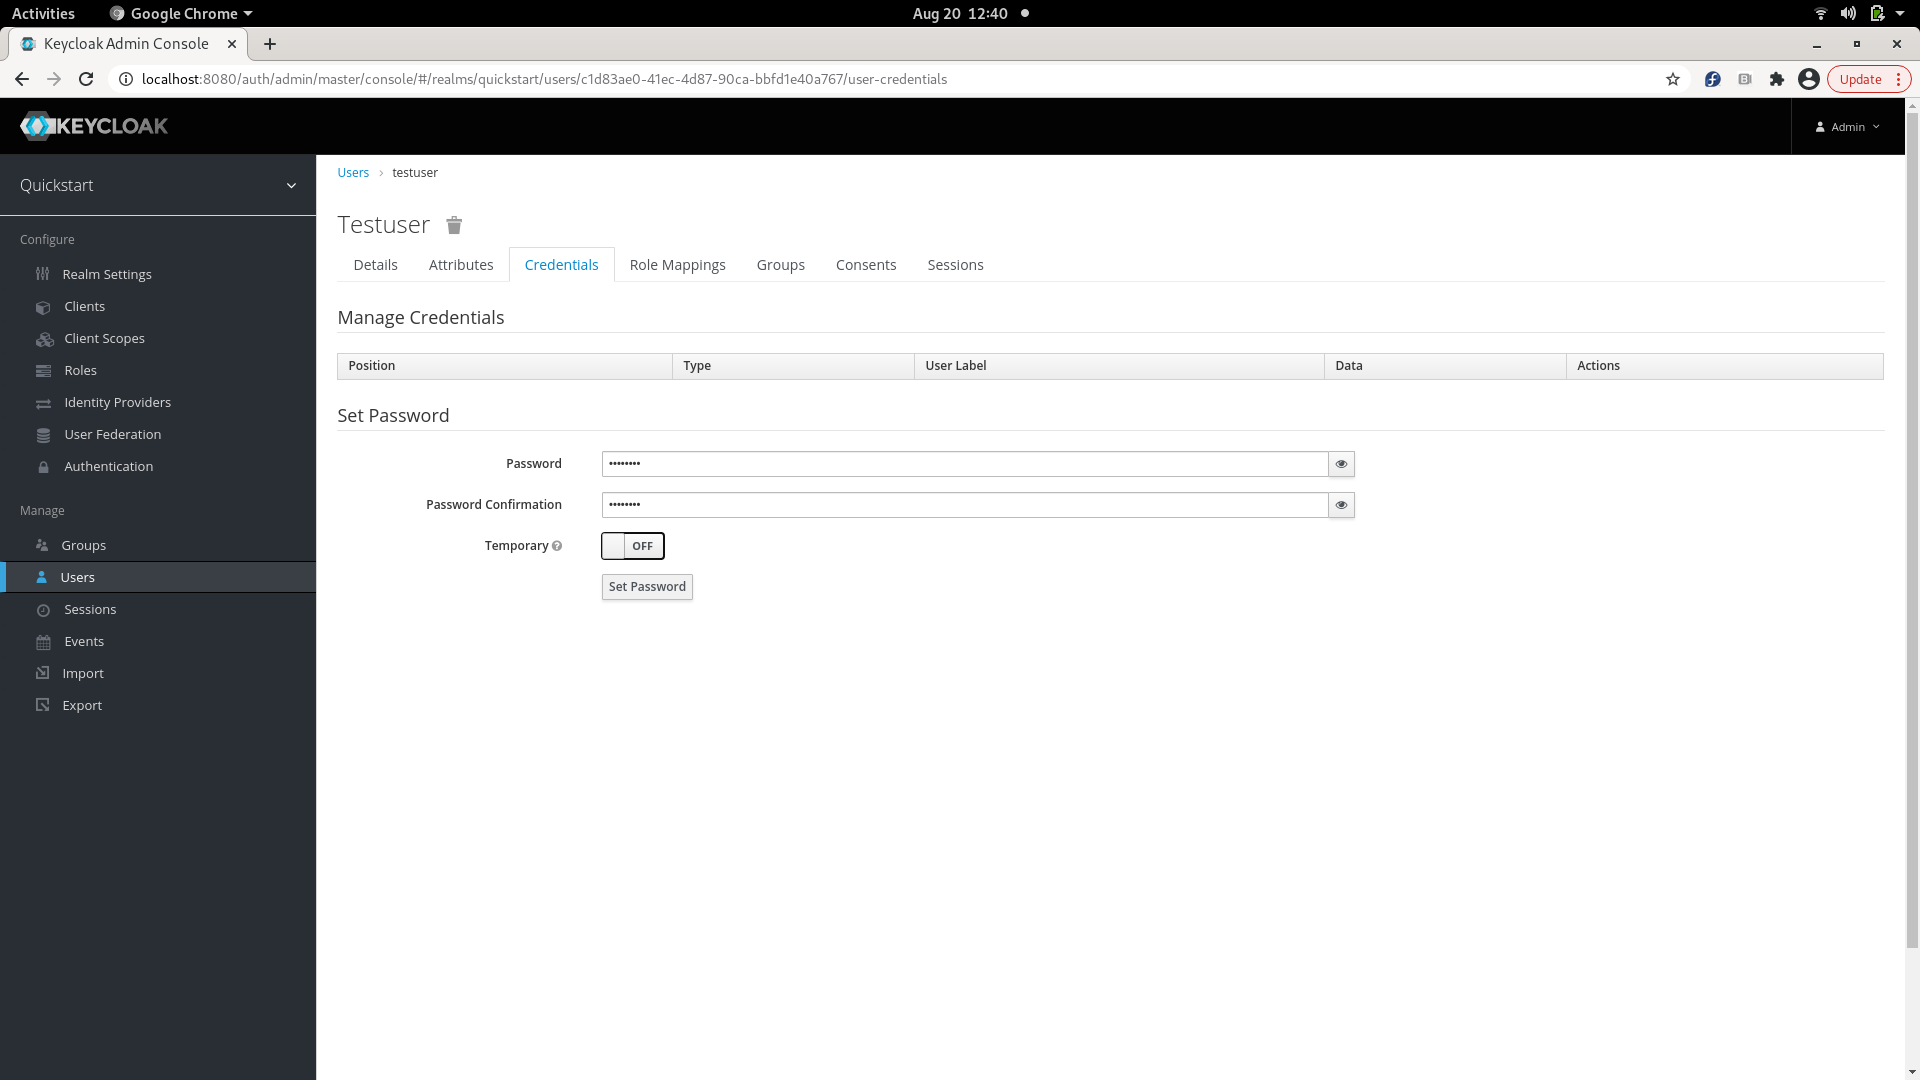
Add user credentials:
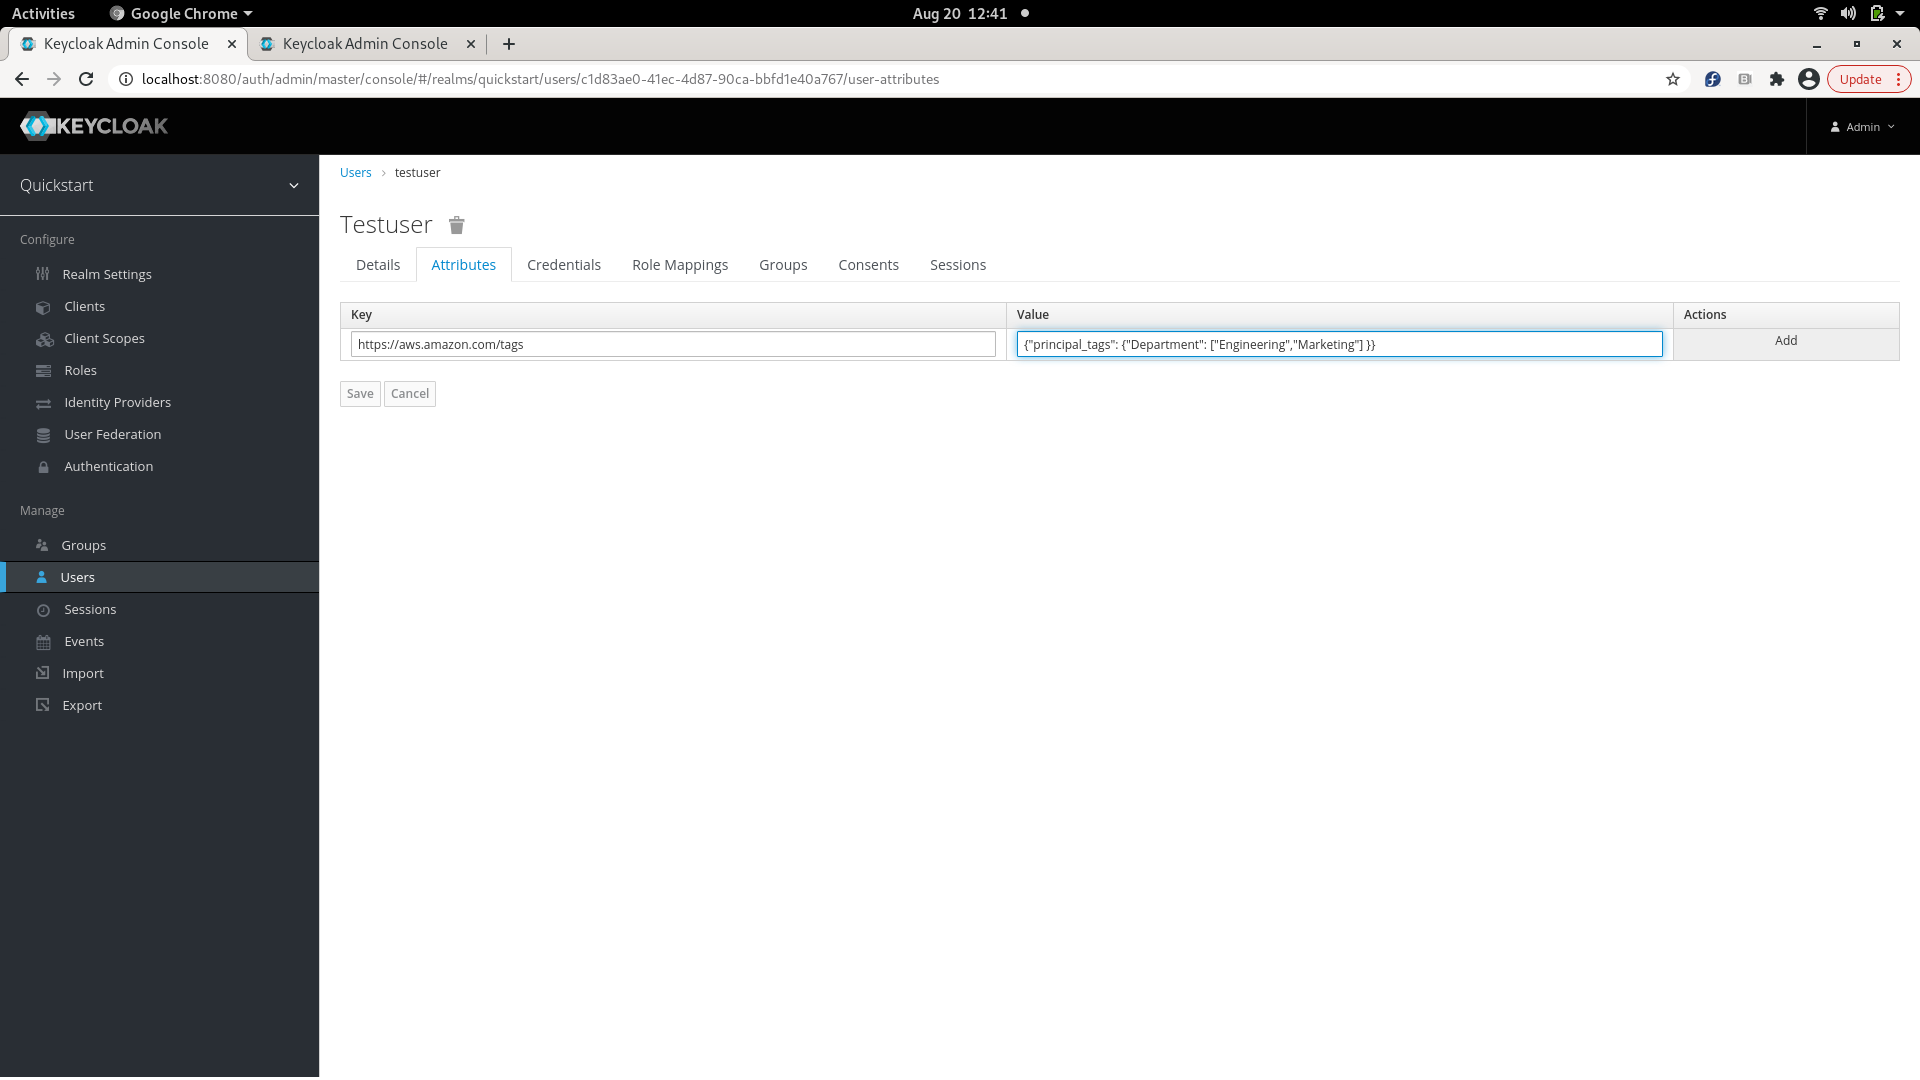
Add tags to the ‘attributes’ tab of the user:
Add a protocol mapper that maps the user attribute to a client:
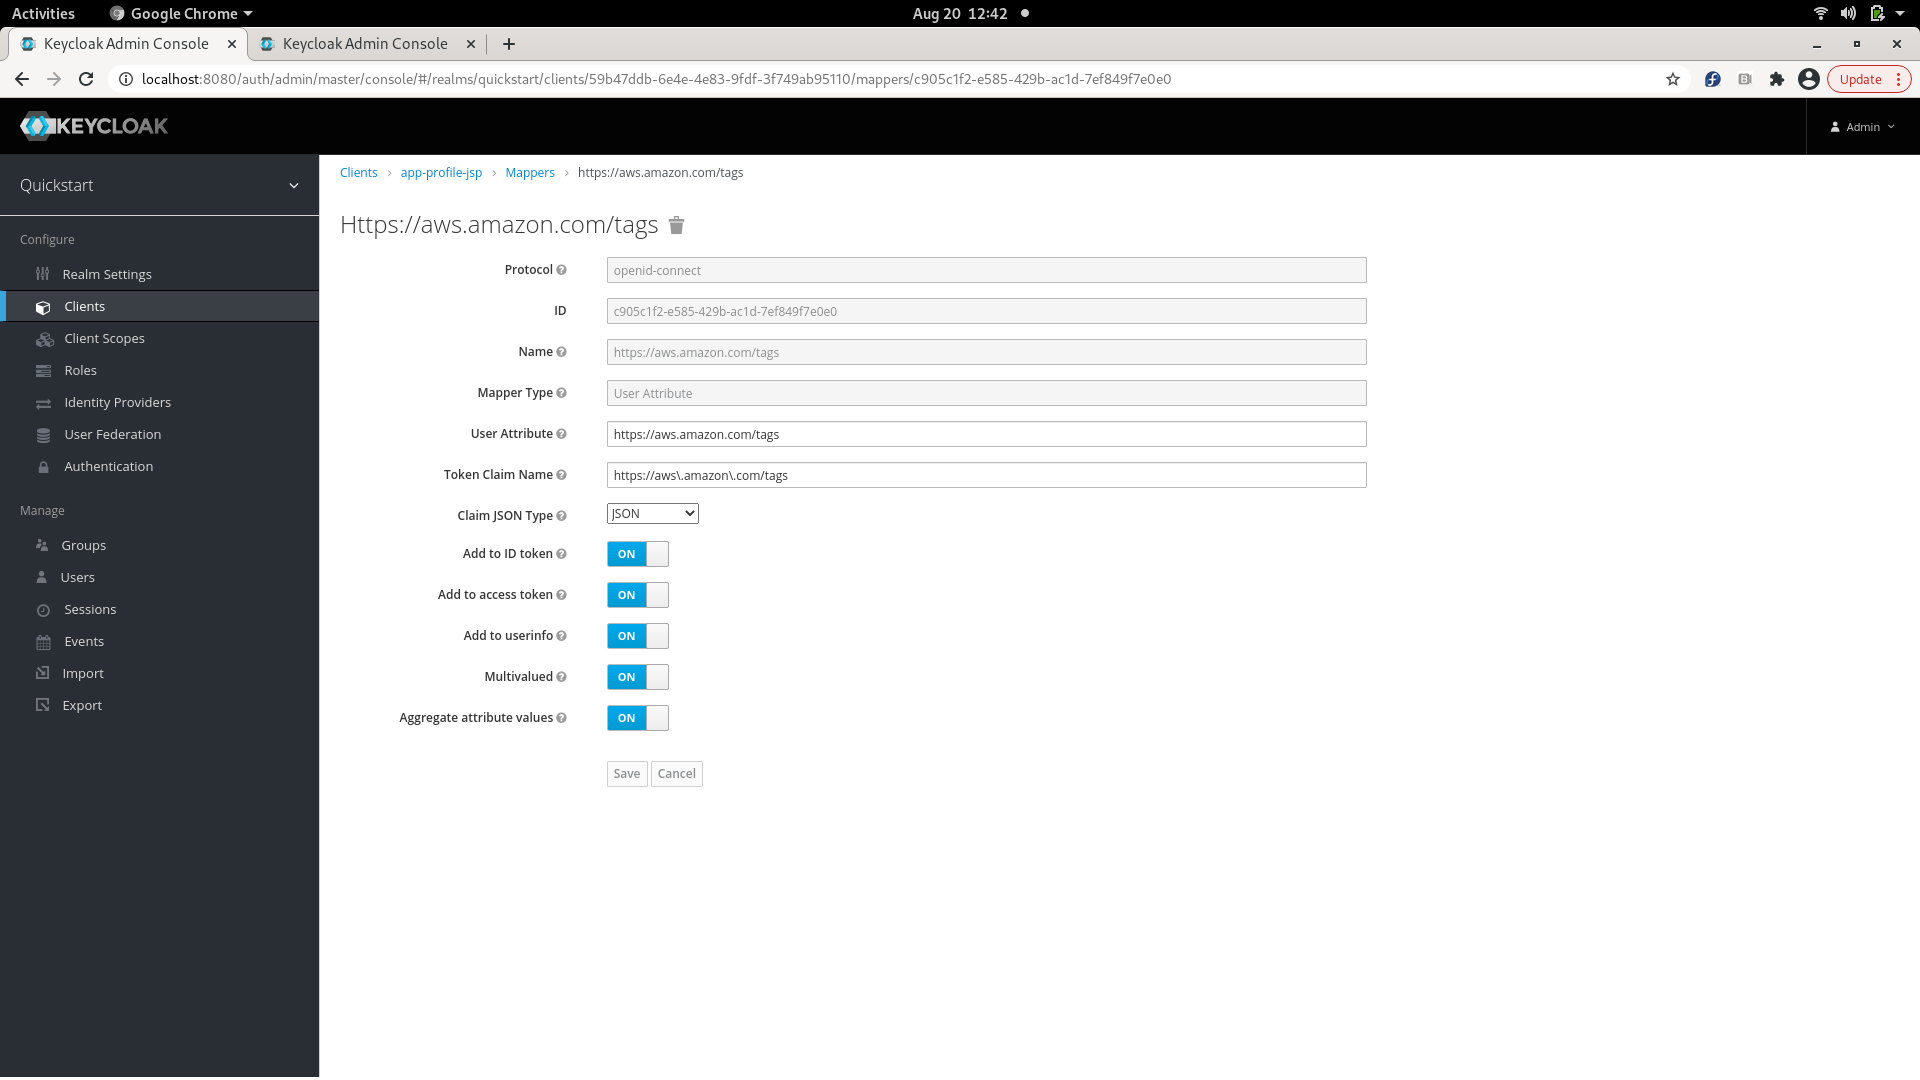
After these steps have been completed, the tag ‘Department’ will appear in the JWT (web token), under the ‘https://aws.amazon.com/tags’ namespace.
Tags can be verified by performing token introspection on a JWT. To introspect
a token, use client id and client secret as follows:
KC_REALM=demo
KC_CLIENT=<client id>
KC_CLIENT_SECRET=<client secret>
KC_SERVER=<host>:8080
KC_CONTEXT=auth

curl -k -v \
-X POST \
-u "$KC_CLIENT:$KC_CLIENT_SECRET" \
-d "token=$KC_ACCESS_TOKEN" \
"http://$KC_SERVER/$KC_CONTEXT/realms/$KC_REALM/protocol/openid-connect/token/introspect" \
| jq .